Chalk Lettering | Easy Art Transfer Method
Ever wondered how you could easily get the perfect chalkboard art? Check out this super simple method to transfer your hand lettering and designs to a chalkboard to create beautiful chalk lettering.
Do you have a lettering piece or design you’ve sketched, but want to turn it into a beautiful piece of chalk art? Or do you want to create chalk art, but don’t think you have the skills to create it from scratch? You can do both with this easy transfer method.
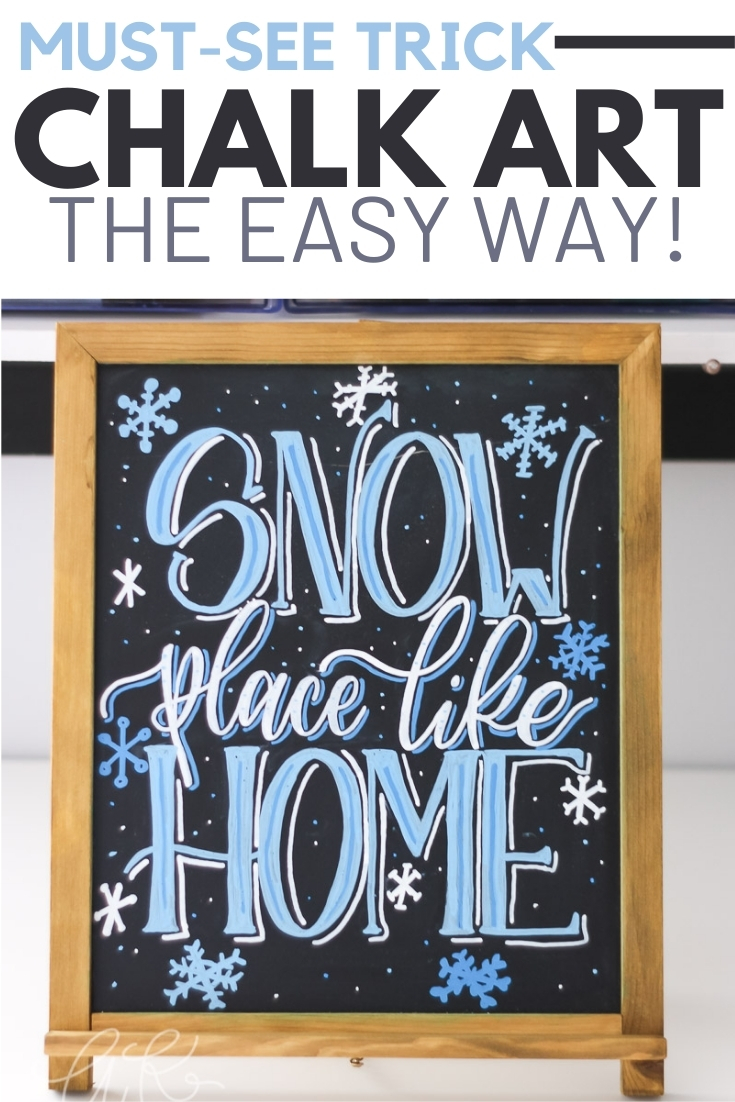
Before we get to it, let me show you where I started with this project. I was spacing out during my last virtual class of the semester (bad student!) and I sketched a mockup of an art piece I wanted to create.
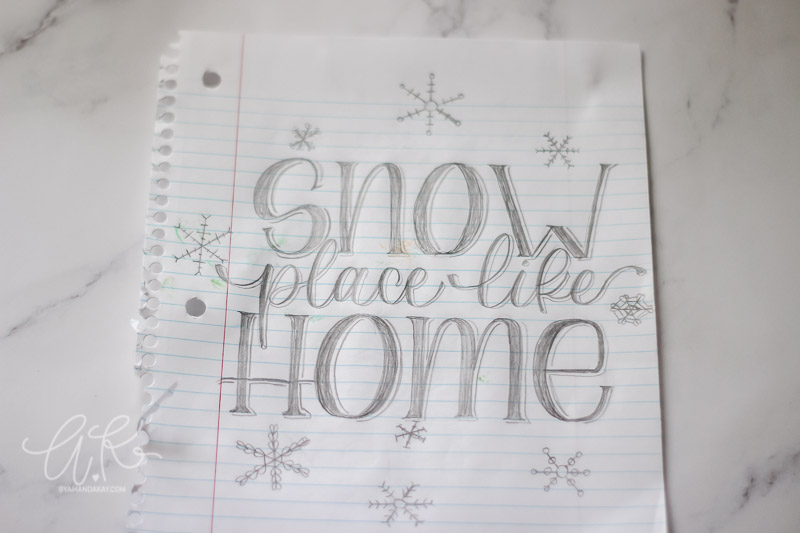
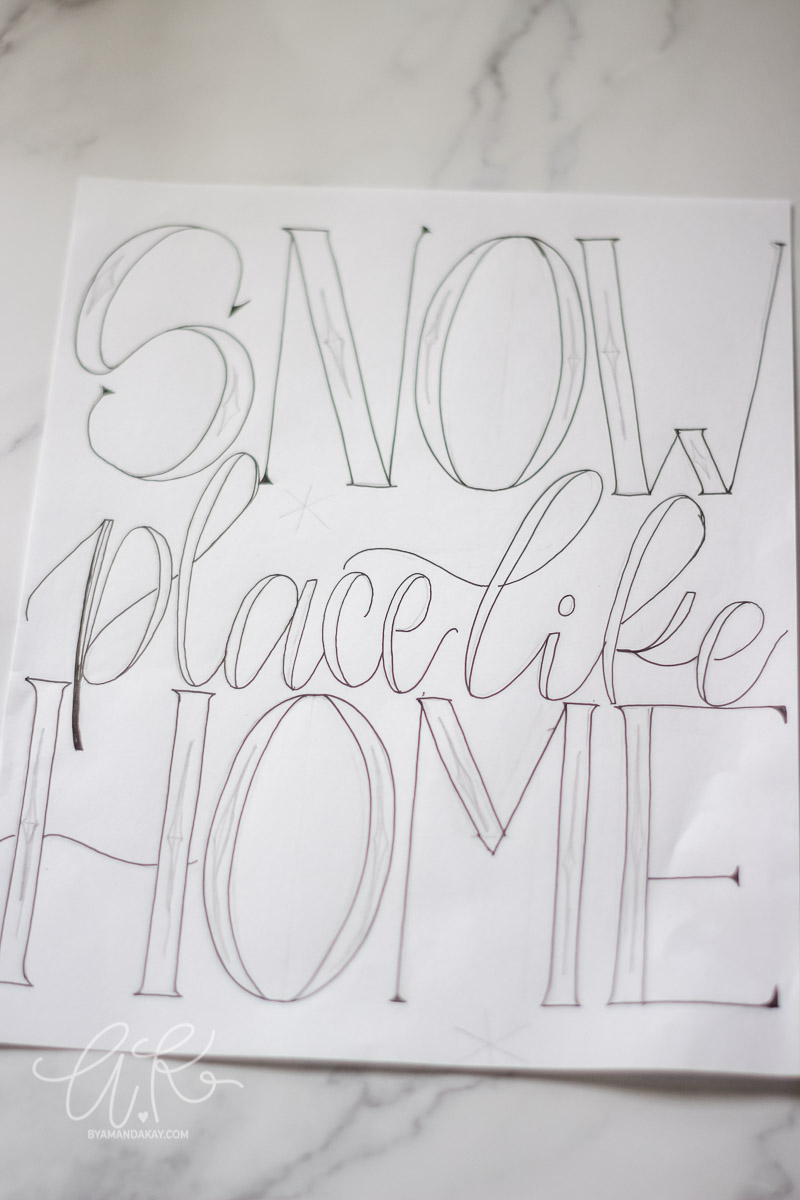
I decided that I really wanted it to be chalk art, but it was too small for the large chalkboard that I was sent from Chalkola last year. So I quickly sketched out a larger draft of a similar version and set about transferring it over to the chalkboard. The step by step tutorial is below, along with a quick 1-minute video I shared on Instagram of me filling it in with Chalkola chalk markers.
How to Transfer Designs to a Chalkboard
Supplies Needed:
- Chalkboard
- Chalk markers
- Chalk
- Design (printed out, or hand-drawn)
- Pencil
- Washi Tape
The first step is deciding on a design. You can see the one I started with above, but you could also easily print a design you’ve created on the computer. Make sure you print it to the size of your chalkboard. The chalkboard I’m using is 12″ x 15″ so a regular size piece of paper is the perfect size.
Flip the paper with your design on it face down, and using chalk, shade all over the paper. In my example, I am using blue chalk so that you can see it against the paper. Feel free to use whatever color you have!
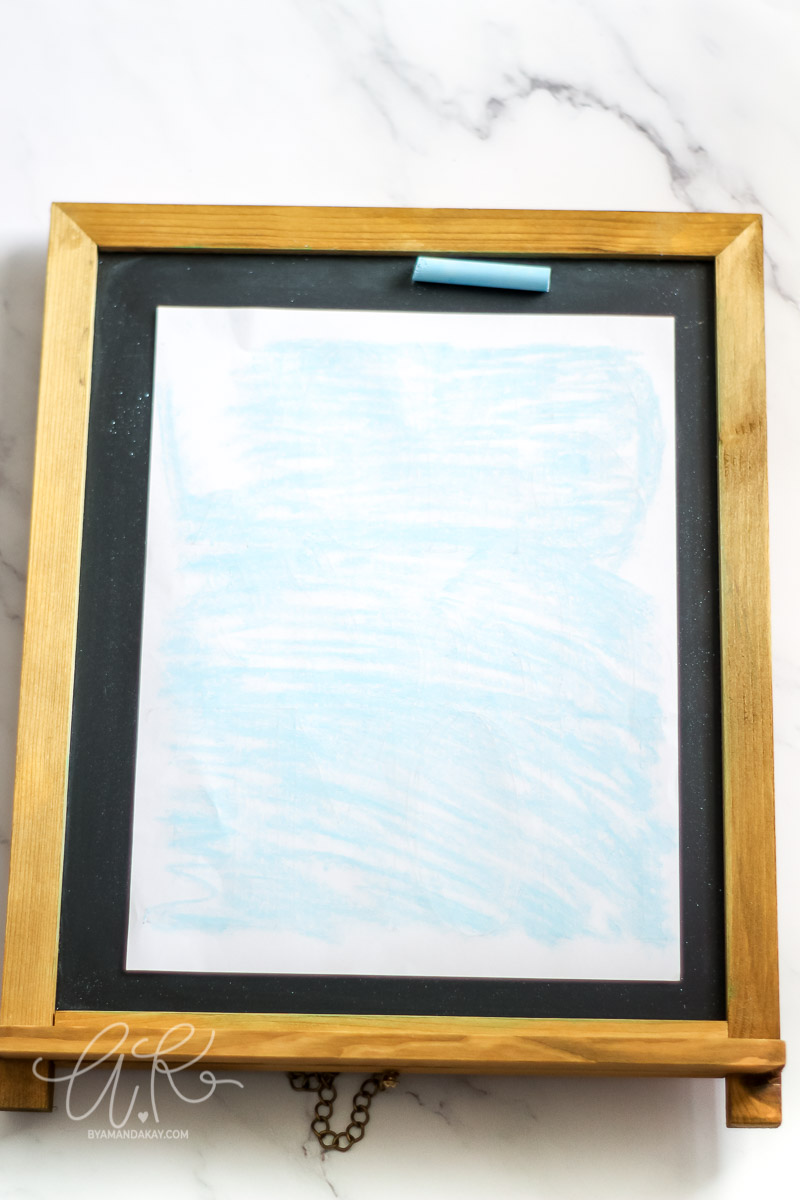
Then flip the paper back over so you can see the design. Center it on the chalkboard and secure it in place with Washi tape. You could also use painters tape or art tape. This will keep the paper from slipping around in the next step.
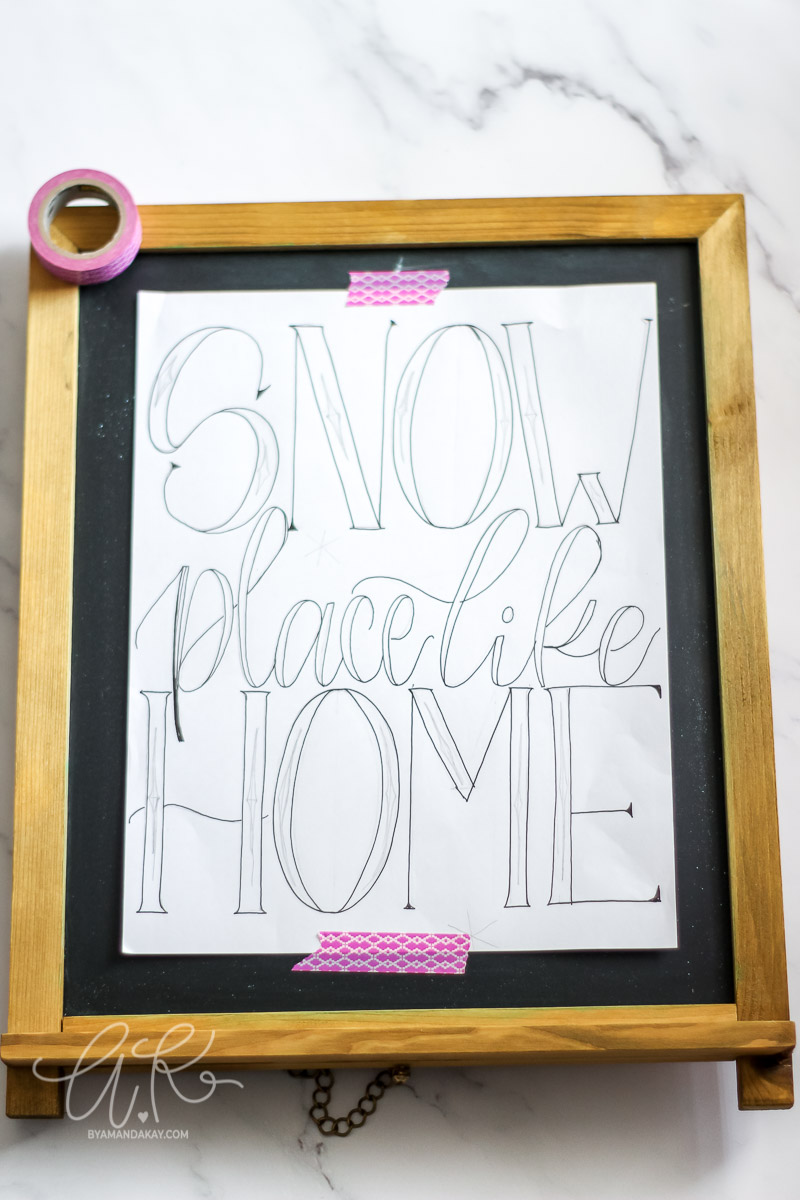
Use a pencil to trace over the design with a fair amount of pressure. You don’t need to press crazy hard, but press enough so that the chalk transfers. Check after tracing a few lines that you are leaving a transfer.
Go over the entire design with pencil to transfer it to the chalkboard. When you are finished, gently lift up the paper and you’ll see a light outline of the design.
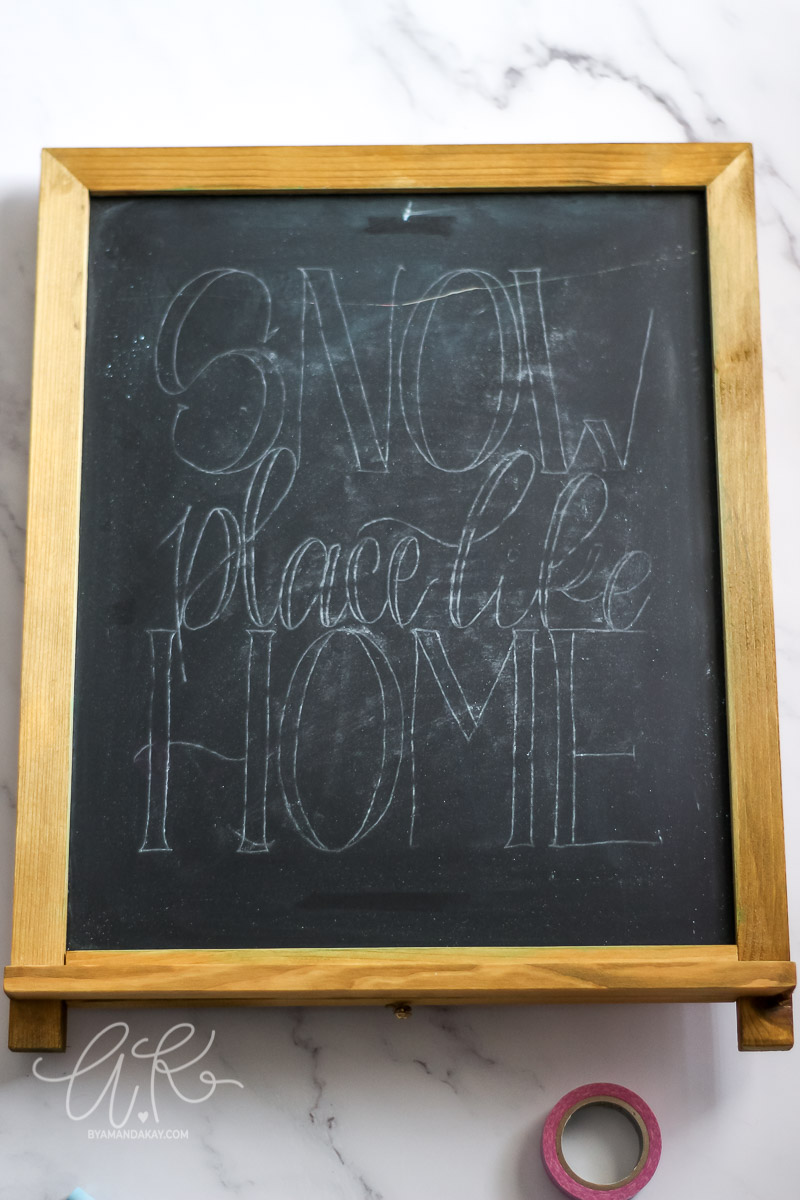
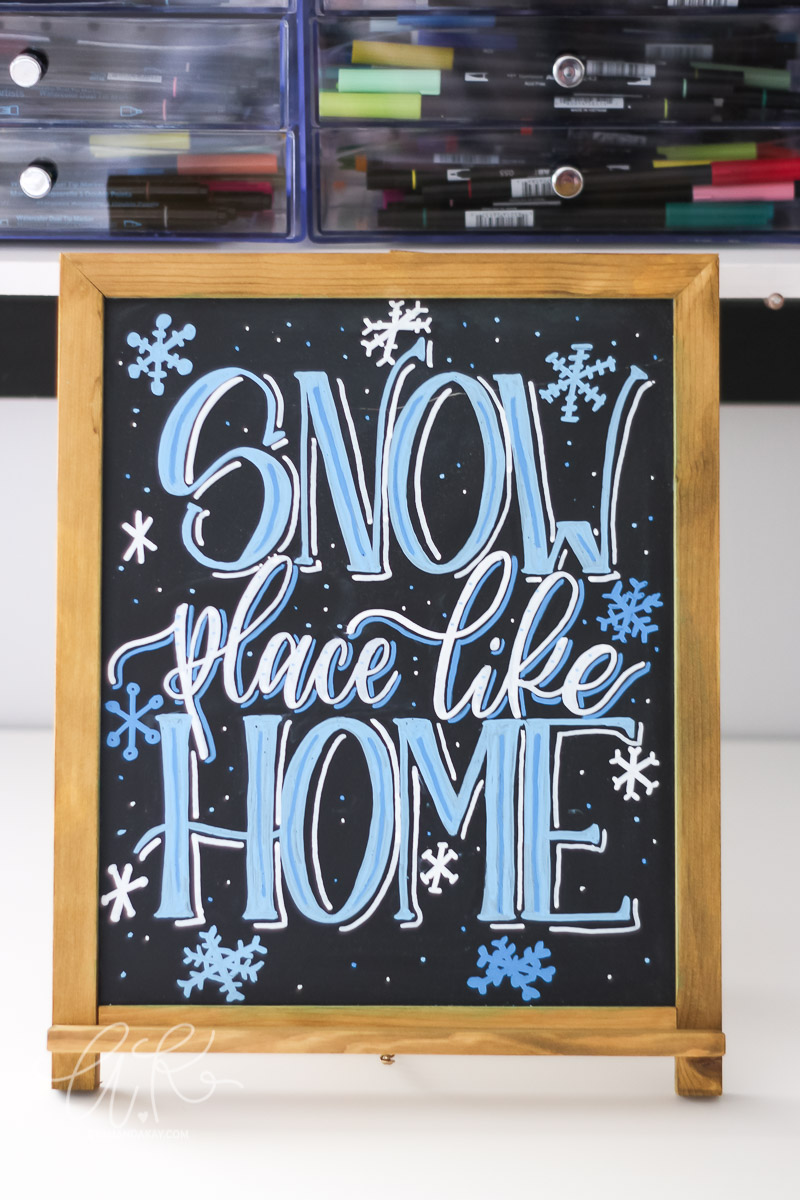
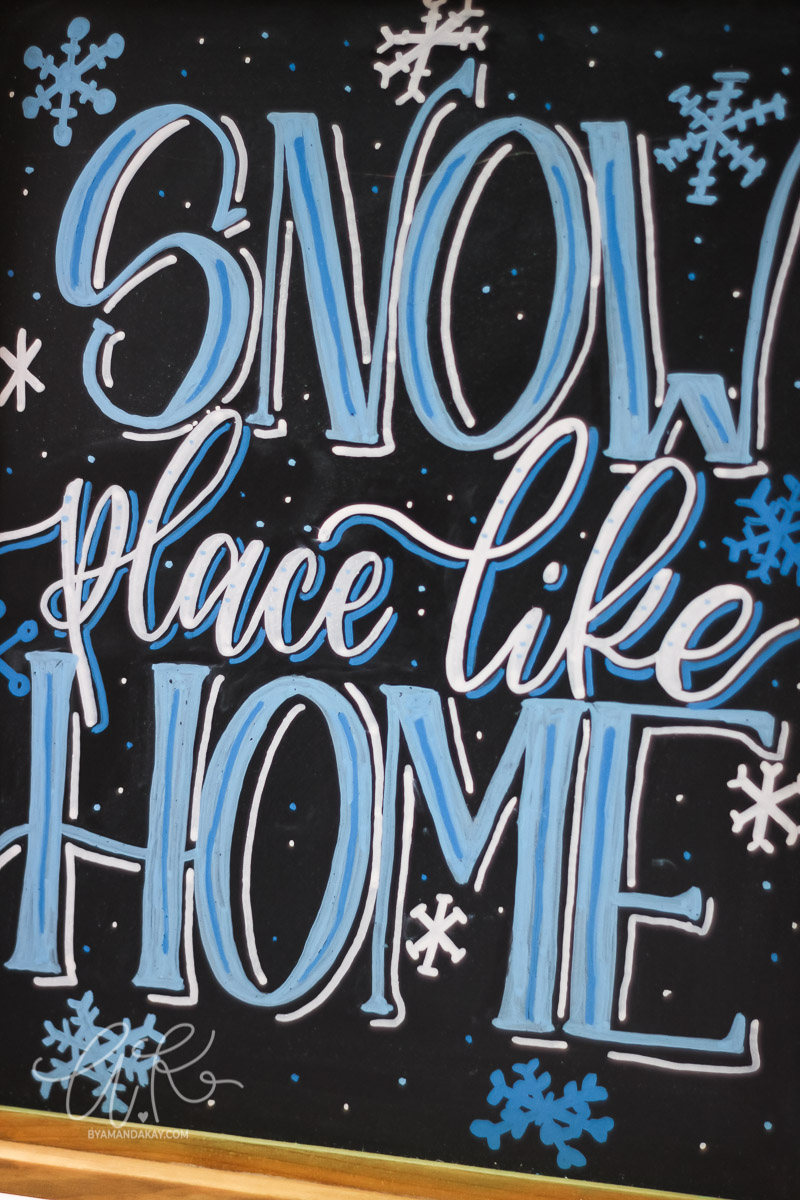
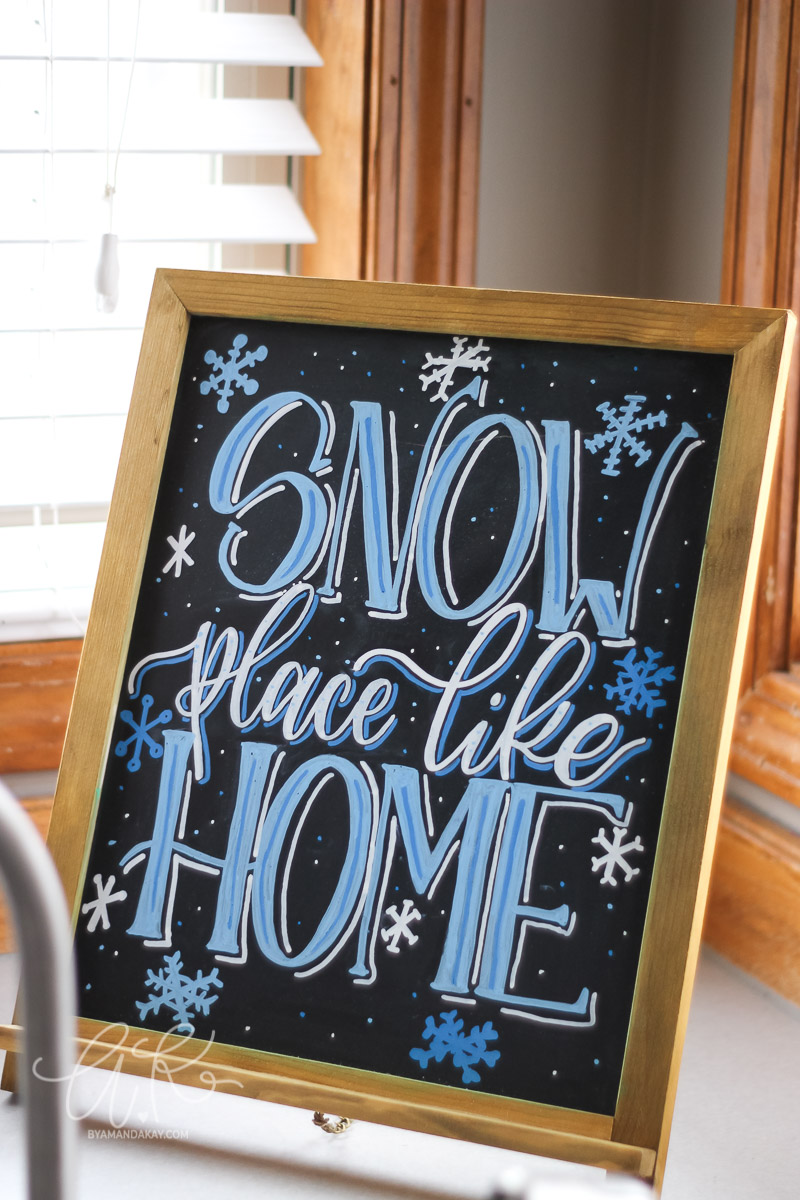
Easy right?! Now for the fun part! Use Chalkola chalk markers to fill in the design. For mine, I added in snowflakes and shadows for more dimension and to mimic the original doodle I did during class.
The great thing about using chalk markers, is that once they have dried you can use a DRY cloth to wipe away any stray chalk marks from the original design transfer, and you won’t wipe off the chalk marker.
If you do happen to make a mistake with the chalk marker though, you can wipe it off with a damp cloth. If you need to clean up a tight space, use a damp q-tip.
Now go forth and create those beautiful chalk lettering pieces you love and your friends will be none the wiser to your trick 😉
Watch the chalk lettering video on Instagram
More lettering methods:
- How to Hand Letter on Cork Coasters
- How to Hand Letter on Acrylic Ornaments
- How to Hand Letter on Notebooks
Love it? Pin it!