
Simple Watercolor Backgrounds with Tombow Dual Brush Pens
Make these beautiful and simple watercolor backgrounds with Tombow dual brush pens featuring watercolor smooshing and wet-on-wet watercolor techniques.
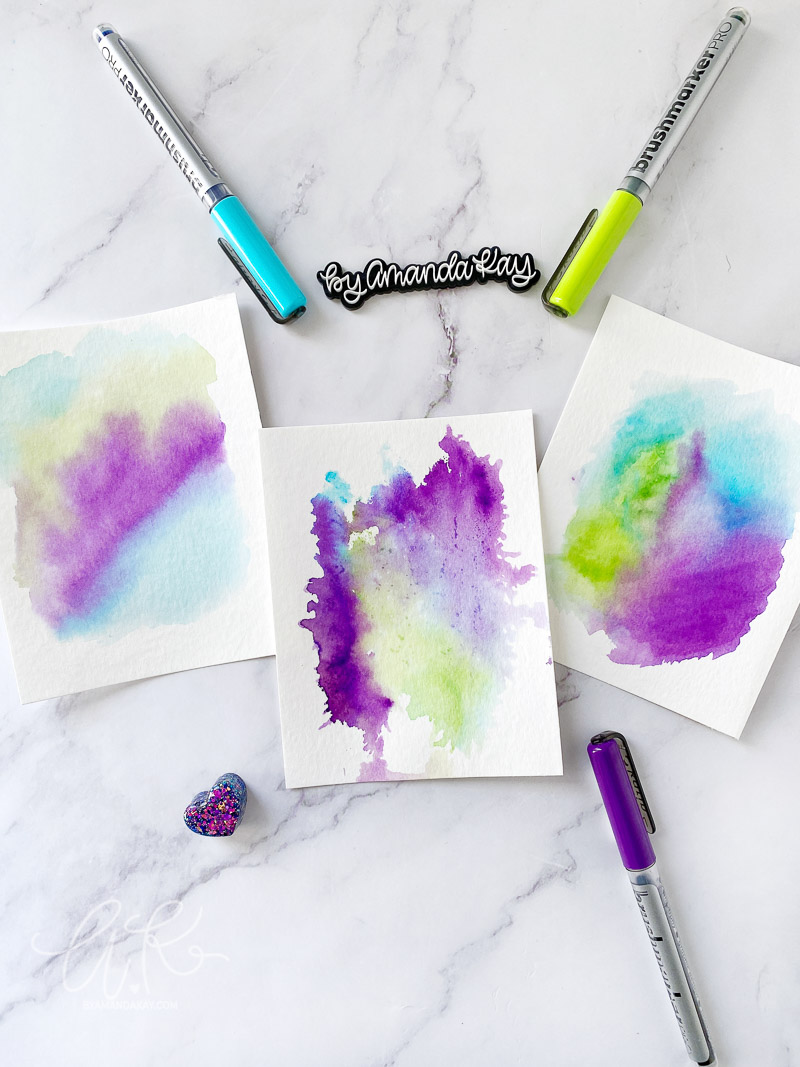
Did you know that you can create watercolor backgrounds using Tombow markers? I like to use these watercolor backgrounds for lettering on or even adding some line art on top of. They add a great little pop of color to artwork, but they are super easy to make! There is no right or wrong way to use these watercolor background techniques because each background is totally unique!
The watercolor smoosh and wet-on-wet watercolor techniques are two methods featured in this tutorial. You can watch the 6-minute video below or see the step by steps in text and photos.
Tombow Watercolor Backgrounds
Supplies Needed:
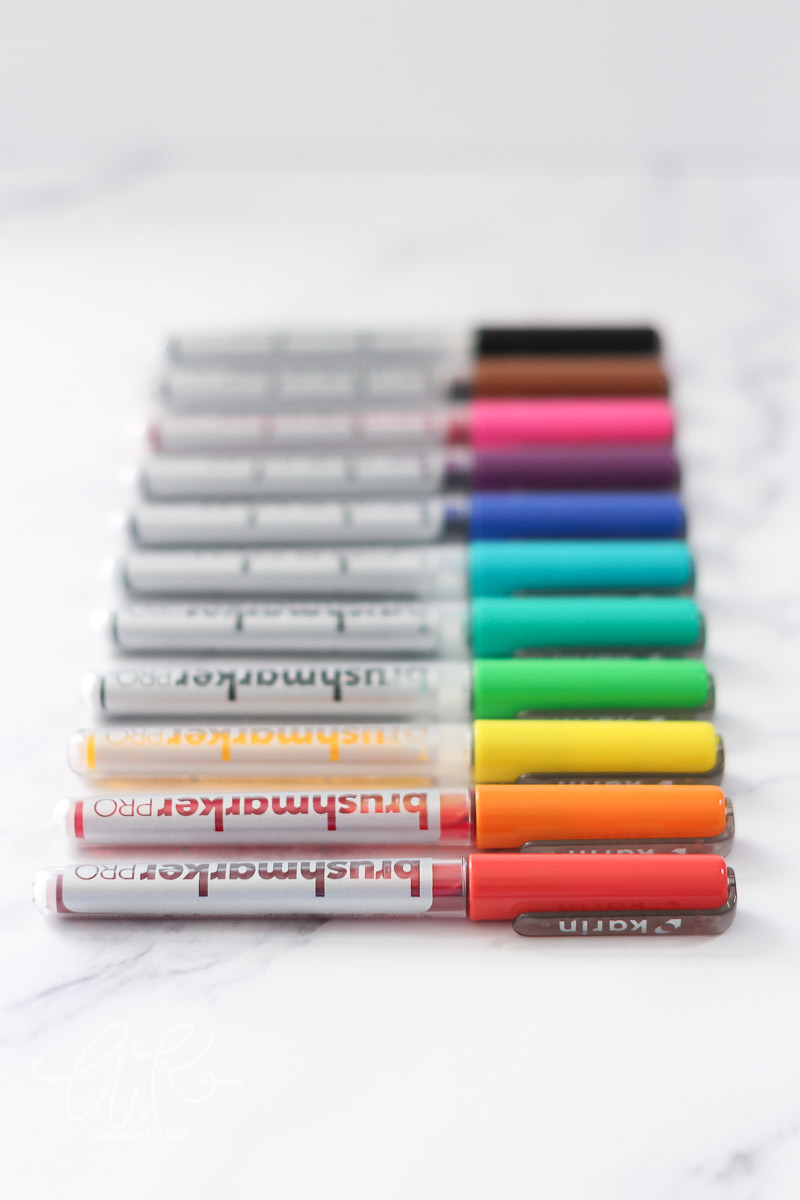
- Tombow Dual Brush Pens
- Watercolor paper
- Clean jar of water
- Paintbrush any round brush will do!
- Paper Towel
- Plastic Paint Palette
- Plastic bag or plastic wrap
- Water dropper or small spray bottle
Tombow Watercolor Background Smooshing Technique
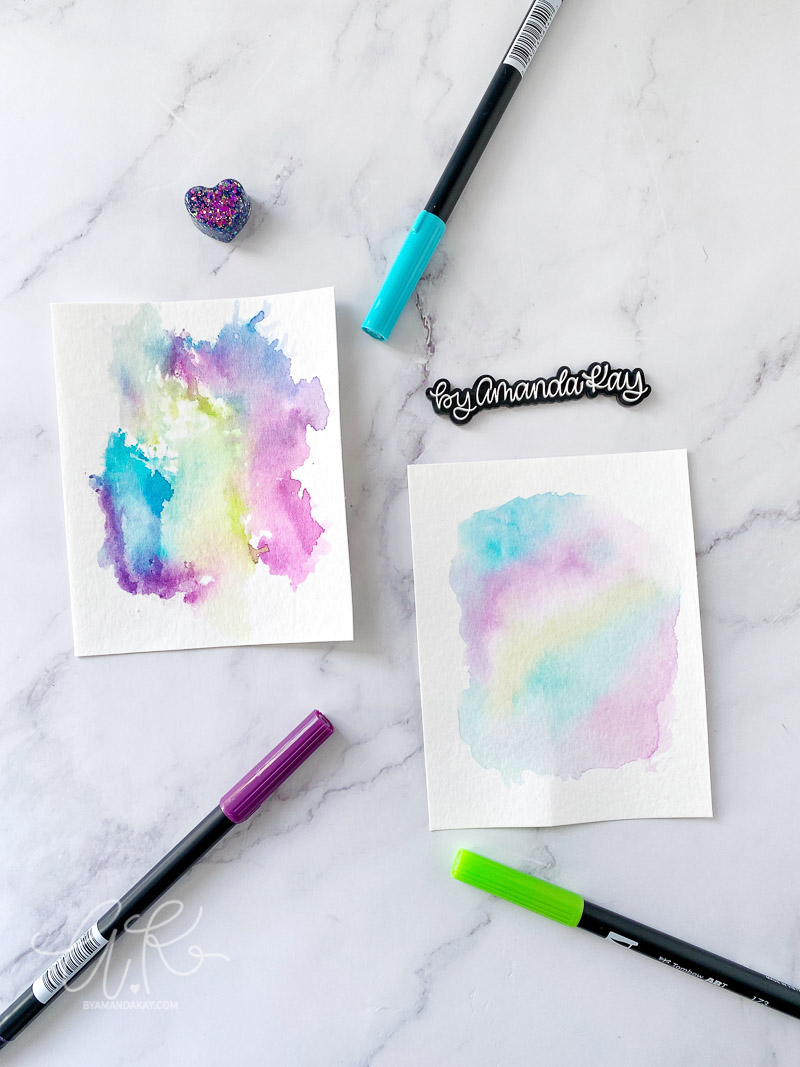
Start with a piece of watercolor paper cut down to your desired size. I’m using a piece cut to 5″ x 4″ in my example.
Next, using a plastic bag or plastic wrap, take the Tombow markers and color on the plastic. Be sure not to color on more plastic than your paper is wide.
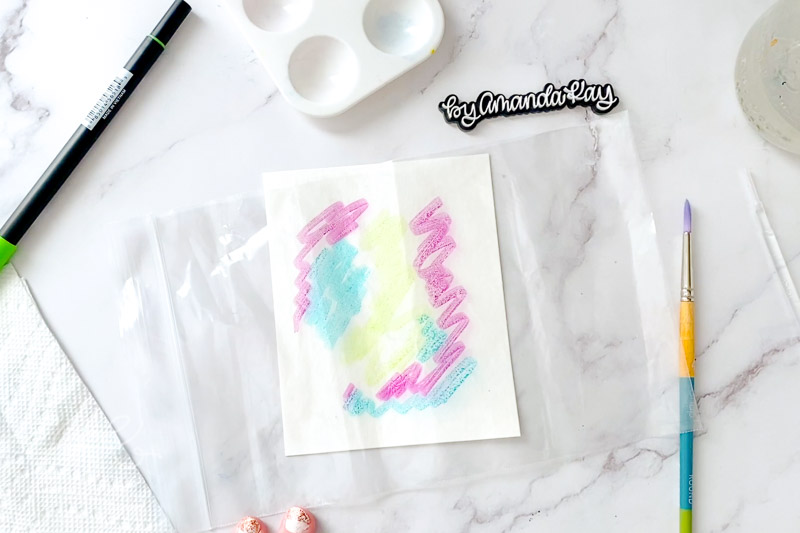
Next, add some drops of water to the plastic on top of the marker. You can also use a fine mist spray bottle to we the plastic as well.
Flip the plastic bag over and place it on top of the watercolor paper. Then take your finger and “smoosh” the colors around.
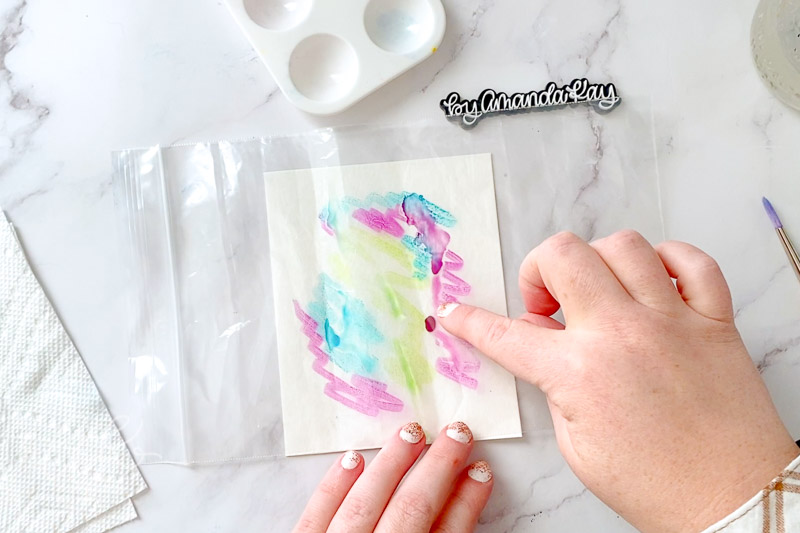
Keep rubbing your finger around to transfer all of the marker and water onto the watercolor paper. When finished, slowly peel up the plastic.

Sometimes excess water may pool in one area. If this happens use the corner of a clean paper towel to gently blot up the excess. Otherwise, leave the new watercolor smoosh background to dry before adding any lettering or line art on top.
Looking for Supplies?
Check out my Amazon Storefront where I’ve saved all of the products I use in my projects. These are all supplies that I use and would recommend!
Tombow Wet on Wet Watercolor Background Technique
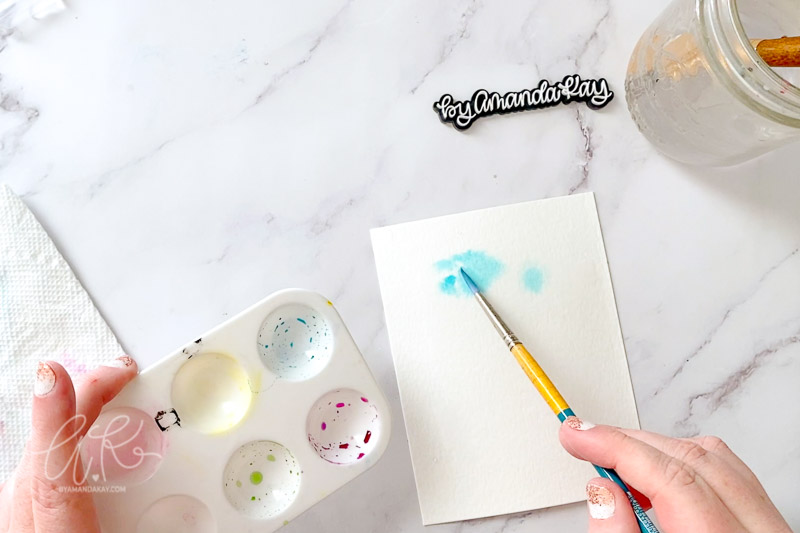
The next method involves using the plastic paint palette to create watercolors with Tombow markers.
Gently color in one well of the paint palette with the Tombow marker, and repeat for each color you will be using.

Add a drop of water to each paint well you just filled with marker, and mix up to create a watercolor paint.
Next on a new sheet of watercolor paper, add a light wash of clean water. You don’t need to oversaturate the paper, just a light gentle wash of water will do the trick.
Using the watercolor paint you created, “blob” it on the watercolor paper where you’ve added the wash. The wet watercolor paint will create a nice feathered effect when it hits the water.
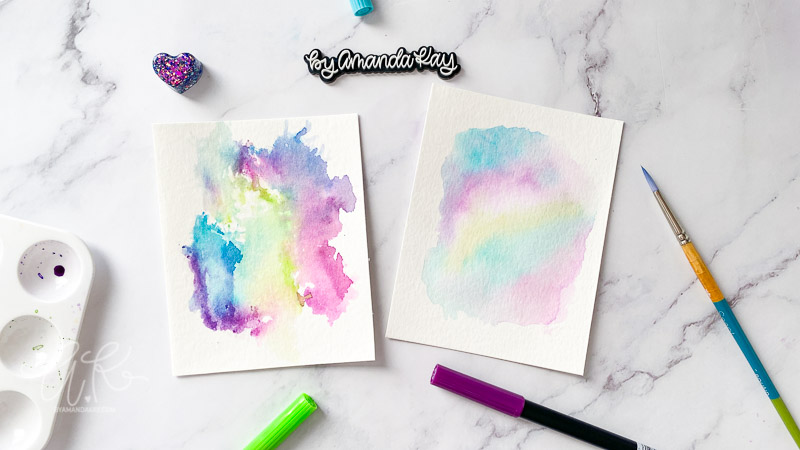
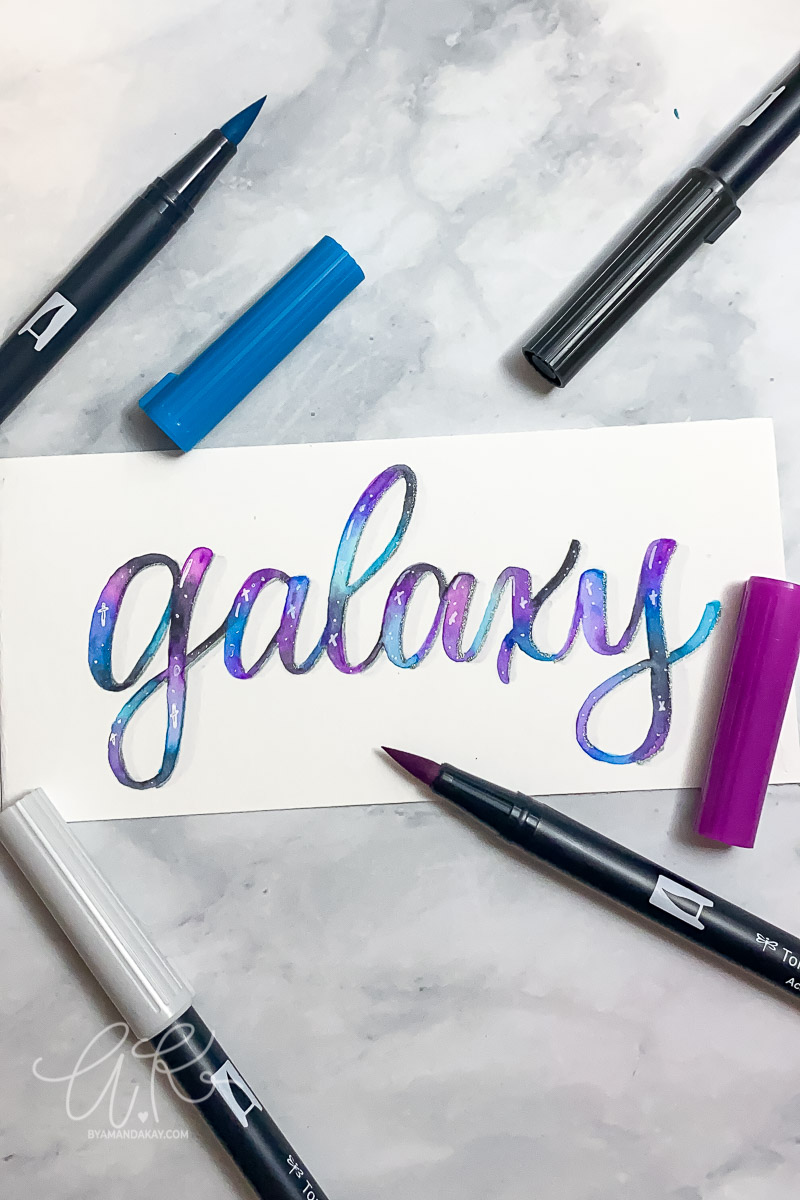
Continue painting and blobbing until you achieve your desired look and effect. I love using this method to create galaxy look backgrounds.
The wet on wet watercolor method will produce a less saturated and softer look than the watercolor smoosh method. Remember that neither of these methods is an exact science and that is the beauty of it. You cannot “mess up” because no two watercolor backgrounds will ever look the same!
Watch the step by step tutorial video below to see both Tombow Watercolor Background methods!
More watercolor tutorials:
- How to Use Tombow Colorless Blender Brush Pen ~ 3 Ways!
- Watercolor Blending Tutorial with Tombow Dual Brush Pens
- DIY Hand Lettered Watercolor Bookmarks
One Comment